Showing posts with label sweet. Show all posts

Tuesday, 30 July 2013

Pine Nut Semi Freddo

Pin It
On Saturday we decided to combine our frozen course & pudding together bringing in some of our favourite Italian flavours. Jo baked the most delicious olive oil & peach cake (if you ask her extra nicely she may share the recipe) and I made a pine nut semi freddo to accompany it. Semi Freddo means half cold in Italian and is a great way of making something similar to ice-cream but without having to churn it. After trying pine nut gelato in Italy I was hooked & desperate to recreate at home.

This recipe makes enough to fill 1 loaf tin & about 8-10 portions depending on how thick you wish to slice it.
You will need

  • 50g caster sugar
  • 4 large, free range eggs
  • 500ml double cream
  • large handful of pine nuts, toasted till lightly golden
To begin, lightly oil your loaf tin and then line with cling film.

Next up separate your eggs into 2 large bowls before pouring the cream into a 3rd, medium sized bowl. If you do the whisking in this order you won't need to wash the beaters between each bowl. Begin by whisking your egg whites with a small pinch of salt till you get stiff peaks. Set aside.

Next add the sugar to the egg yolks and beat together till the mixture has almost doubled in size and is super creamy and light in colour. Set aside again.

Finally whisk the cream till soft peaks begin to form but don't over beat. Fold the cream into the egg yolk mixture and then adding 1/2 at a time fold in the egg whites. Pour around a 1/3 of the mixture into your lined tin before folding the pine nuts into the remaining mixture. Pour this in on top before gently laying an extra sheet of clingfilm on top of it all. Finally freeze for around 4 hours or till frozen solid. To serve, take the semi freddo out of the freezer about 20 minutes before serving. Turn out onto a board and slice into portions. Alternatively you could scoop it out but then it may be better to either mix the pine nuts through the whole mixture or to to sprinkle them on top after serving.

Monday, 29 July 2013

Cucumber, Mint, Apple & Lime Ice Lollies

Pin It
As promised, heres the recipe for the Cucumber, Mint, Apple & Lime Ice Lolly from the Summoning the Summer Plate Lickers event.

This recipe makes enough for 10 ice lolly moulds. I bought mine through the American Amazon as I couldn't find it anywhere in the UK but you may have better luck so its worth having a look around. I'd also recommend making a smaller batch and freezing in an ice cube tray & serving in a jug of Pimms & Lemonade.

You will need
  • 150g caster sugar
  • 300ml water
  • 170g peeled & cubed cucumber
  • 350ml apple juice
  • Handful of chopped mint leaves
  • Zest & Juice from 1 lime
Begin by making the syrup. Combine the caster sugar and water in a saucepan & simmer till the sugar dissolves. Set aside to cool completely.

In a food processor combine the cucumber, mint & lime zest & juice then pulse till pureed. Next add the apple juice & syrup & pulse till combined. Pour into your lolly moulds and freeze. Its as easy as that!

Thursday, 20 June 2013

Rhubarb & Ginger Crumble Slice

Pin It

If you know me in real life you'll know that I've had a long time aversion to rhubarb. I have a feeling it was a bad batch of rhubarb crumble that put me off for a long time but with the help of Jo's Rhubarb Crumble cocktail at Sweeteasy and Jack's Gelato's Allotment rhubarb sorbet I have finally begun to see what all the fuss it about.

I thought there was no better way to celebrate my new found love than with a recipe.

Makes 16 squares from a 20x20cm tin
You will need-
For the crumble
  • 70g oats
  • 240g plain flour
  • 130g caster sugar
  • 40g light brown sugar
  • 3/4 tsp baking powder
  • 1/2tsp salt
  • 170g butter, cubed
  • Zest of 1/2 lemon
  • 1 egg, beaten

For the middle
  • 1tsp ground ginger
  • 4 tsp cornflour
  • 85g light brown sugar
  • 380g rhubarb in 1/2 inch slices
  • 2 pieces of stem ginger in syrup, finely diced
  • 1tbsp syrup form stem ginger jar

To begin preheat your oven to 190C (less if fan assisted) and line your 20x20cm baking tin.

In a bowl combine all the dry ingredients from the crumble ingredients and then add the butter. Rub the butter into the dry ingredients using your thumbs and index fingers like you're fanning out playing cards. Keep going till the mixture starts to clump together but don't overwork it, you still want it to be crumbly. Add the lemon zest and egg and mix till just combined.

Place 2/3 of the mixture into your tin and press down. If its a little sticky you can use a scrap bit of baking parchment to help.
In a separate bowl combine the rhubarb pieces with the remaining ingredient and mix till it evenly coats its then spread out over the dough in the tin.
Finally, crumble the remaining dough over the rhubarb and place on the middle shelf in the oven. Bake for 45-50 minutes or til the the crumble is a golden brown colour. Leave to cool completely before cutting into squares. It keeps best in the fridge if it lasts past a day.


Monday, 4 February 2013

Chocolate Glazed Doughnuts

Pin It
Doughnuts have been on my to do list for a long old time now. I was always a little put off with the idea of them being pretty tricky so was happy to discover that they are in pretty damn easy. As long as you're patient and very careful at the frying stage you will be greatly rewarded for your efforts! 

Last thursday I finally had the perfect excuse to give them a go. Not only did I have a whole day free, but I had also promised to make something sweet for the All Type No Face exhibition. I knew this would be the best way to go about it as I could eat 1 (or 3) and then give the rest away and watch everyone's faces as they took a big bite. I ended up jumping in head first and made a double batch so it was quite nerve racking waiting to try the first one. If you don't fancy the chocolate glaze or are a little pushed for time just add a little lemon juice or water, a few drops at a time to a small bowl of icing sugar till its at a glaze like consistency, like a medium thickness batter I'd say. Did I forget to mention, I also made french cruller doughnuts (which are made with a choux pastry) in the same day. Amazingly light and bubbly, they didn't even make it out of the house, which means my plan did backfire slightly. But you live & learn!

You will need-
For the doughnuts- makes around 15 depending on chosen size
  • 15g fresh yeast or a 7g sachet of fast action yeast
  • 100ml whole milk, lukewarm
  • 200g strong white bread flour, plus extra for rolling out
  • 50g unsalted butter, diced
  • Pinch of salt
  • 1tbsp caster sugar
  • 1 egg, beaten
  • Sunflower oil for frying

For the chocolate glaze
  • 150ml double cream
  • a small cube of butter
  • 1tbsp dulce de leche
  • 150g dark chocolate
  • Pinch of salt
  • Sprinkles or your choice of decorations

To begin, crumble the yeast into the lukewarm milk and leave for a few minutes to get going. Meanwhile, rub together the flour and butter with your finger tips till its a sandy consistency and then add the salt and sugar- this can also be done in a stand mixer with a paddle attachement. Make a well in the centre of the flour mixture and then pour in the yeast & milk mixture along with the beaten egg. Mix well to make a soft dough. You may need a little more flour if the mixture is really wet but add very little at a time. If using a stand mixer now change to a dough hook, otherwise turn the dough onto a floured surface and kneed for around 8 minutes or till the dough is really smooth. When you are happy with the dough place it in a greased bowl cover with clingfilm (a clean shower cap works amazingly well too) and leave in a warm place for 1 hour or till it has doubled in size.

When the dough is ready to go knock the air out and then roll out onto a lightly floured surface. You want it to be about 1/2 inch thick. Next its time to cut your doughnuts out. I used a 7cm round biscuit cutter and the wide end of a piping tip for the little hole. Place cut doughnuts on a lightly floured surface as you go, you will need to keep reforming the dough and rolling out the excess pieces till you have used it all up. Cover the doughnuts with clingfilm and leave to rise again for 40 minutes or till doubled in size.

When the doughnuts are nearly ready add your oil to a heavy based saucepan. Its a pretty good idea to use a thermometer so you can keep the temperature constant. You're looking for it to reach and stay between 180C & 190C. Get your production line ready with a cooling rack and kitchen paper on hand. I used a fairly small saucepan so fried 1 doughnut at a time, be careful not to overfill as this will cause the oil to bubble over and can be very dangerous. I found a slotted spoon and a bamboo skewer were the best tools for the job, the slotted spoon is best for gently lowering the doughnut into the oil without deforming it and the bamboo stick (or a chop stick) is great for flipping it over and taking it out.
Once your oil is at the correct temperature lower you doughnut in and fry for 30 seconds on each side.

Once the minute is up remove onto kitchen paper and leave it there for a minute or so to soak up some of the oil. Place on a rack to cool.

Keep going till you have fried all of the doughnuts and then take the oil off the heat and leave to one side to cool completely.

Whilst the doughnuts are cooling make the chocolate sauce. Bring the cream, dulce de leche & butter to a simmer in a small pan and stir till nice and smooth. Place the chocolate in a bowl and pour the cream mixture over it. Stir till it has all melted and then add a pinch of salt.

To decorate dip one side of the doughnuts in the chocolate and then top with your sprinkles.

The doughnuts are best the day they're made, so eat them as soon as they're made if possible, I don't imagine this being very difficult!

Saturday, 8 December 2012

Mill Road Winter Fair

Pin It
 Just a quick little post to share with you some photos of my stall at this year's Mill Road Winter Fair. It sure was a cold one and it felt like it took a few days to get my body temperature back up to normal. But cold aside, it was so much fun sharing a stall with Jo. On the stall this year I did Salted Caramel & Chocolate Ganache Macaron, Sticky Gingerbread loaves, Flourless Chocolate Cake, Carrot & Walnut Muffins, Blueberry & Apple Crumble Muffins, my mum's Baklava, GF Raspberry, Almond & Coconut Slices, Chocolate Hazelnut Brownies and last but not least Caramel Swirl Brownies. Everything went down well and the macaron were the first to go. I just wish I had saved myself some, they were the things I was most proud of.

We also had a section of Platelickers treats including my mum's cheese and spinach pita, pesto pinwheels, our beetroot chutney & the well loved pineapple chutney (which I conveniently dropped a jar of so I could take some home for myself)

Anyway, as you may know I am jetting off to Sydney later today but I have lined up a few posts for whilst I'm away. I can't wait to arrive in the land of flat whites and kangaroos, but first theres 24 hours of travel to get though. If you want to see what I'm up to whilst I'm gone catch me on twitter or instagram


Wednesday, 17 October 2012

Jaffa Cake Lamingtons

Pin It
baking, cake, children, sweet, sponge, lamington, australia, snowball, snoball, jaffa cake, homemade. treat, dessert, supper, club,
The last time I mentioned lamingtons on this blog I told of a disastrous afternoon in the kitchen. I did however vow to try these again but this time using my own recipe. Now, I don't want to gloat, but I must say these lamingtons beat Dan Lepard's hands down! When Jo & I were planning the menu for the childhood memories supper club I had a bit of a light bulb moment the idea of combining 2 of my favourite sweet treats into 1 popped into my head. Ok, so I admit, lamingtons aren't really from my childhood but their appearance reminds me of Snowballs so perhaps its in actual fact a merge of all 3!

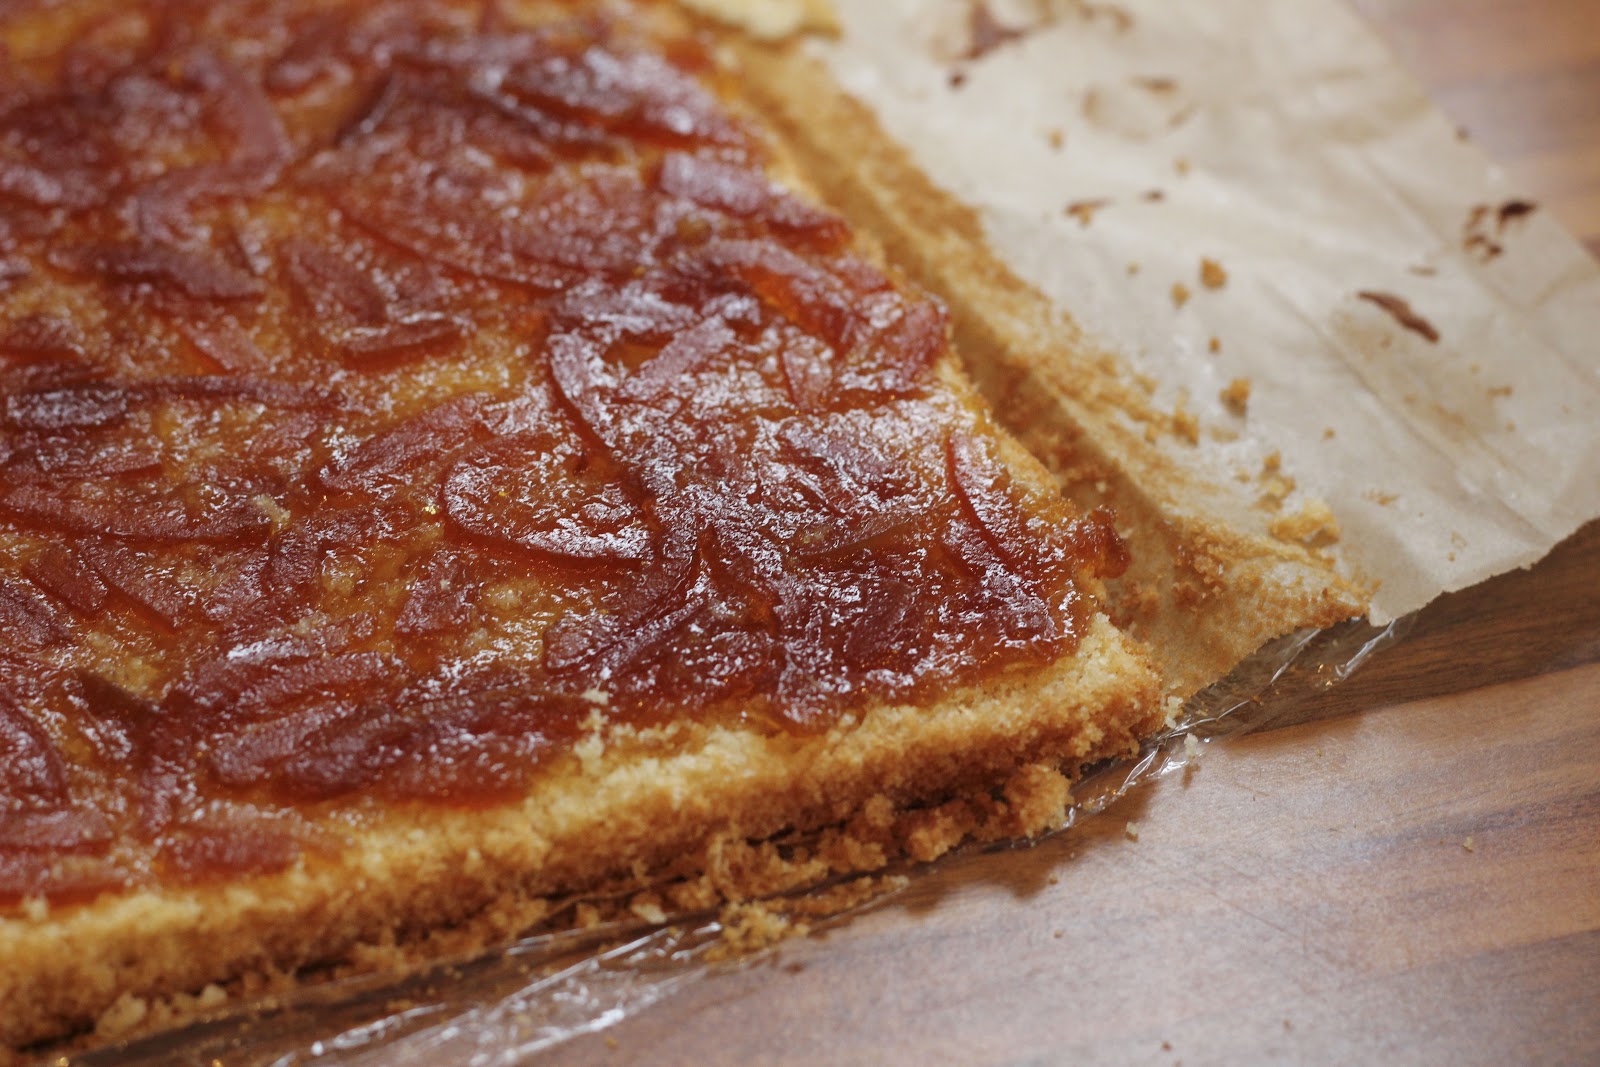
I initially had the idea of using orange jelly as the jaffa cake component but when it came to the taste tests we decided they were way to sweet. Luckily Jo thought on her feet and suggested using the last of her homemade seville orange marmalade and oh my what a treat! Sadly, Jo doesn't have any marmalade left so please don't go knocking at her door. But, you could just use a good quality shop bought or if you're feeling heroic, make your own. We discovered that the lamingtons are even better the next day. So, if you can stand to wait I promise it will be worth it. I just hope I don't get an influx of angry emails from Aussies for messing around with a classic.

Makes 1 20x20cm tin
You will need-
  • 180g unsalted butter, softened
  • 180g caster sugar
  • 3 large eggs
  • 180g plain flour
  • 2 tsp baking powder
  • 1/2 jar seville orange marmalade
  • 10g cocoa powder
  • 30ml cold milk
  • 120ml boiling water
  • 135g dark chocolate, grated or finely chopped
  • 300g icing sugar
  • 250g desiccated coconut
Preheat your oven to 175C. To make the sponge, whisk together the butter and sugar till light and creamy and then one by one, whisk in the eggs. Sieve the flour and baking powder into the bowl and  fold into the butter mixture. Spoon into your tin and smooth the mixture down evenly before baking for around 30 minutes. Check the cake after about 20 minutes and turn in the oven if needed.

Leave the cake to cool completely before cutting it in half horizontally. Spread the marmalade carefully over the bottom layer and then sandwich the top layer back on and press down gently.

baking, cake, children, sweet, sponge, lamington, australia, snowball, snoball, jaffa cake, homemade. treat, dessert, supper, club, marmalade, jam
To make the chocolate coating, mix together the cocoa powder and milk in a bowl till you have a paste. Then whisk in the boiled water followed by the chocolate till it melts. Finally add the icing sugar and then you're ready to go. We found that its best to add a little coconut to a flat dish at a time otherwise it will all get coated in chocolate and you'll end up with a mess.

Cut the sponge into cubes and then get your production line ready. 1st your chocolate, then your coconut and finally a wire rack lined with greaseproof paper. I would suggest having a second pair of hands, one person getting covered in chocolate and the other the coconut but if you're making them on your own just keep one hand free of chocolate as that will help the lamingtons stay neat and tidy.

Once you have coated them all in chocolate and coconut, leave them to set for at least an hour but longer if you can. They can then be stored in an airtight box for a few days.
baking, cake, children, sweet, sponge, lamington, australia, snowball, snoball, jaffa cake, homemade. treat, dessert, supper, club, marmalade, jam
I must finish by saying- I accept no responsibility for chocolate or coconut being found dotted around your home for days to come. Despite there being 2 of us, Jo found a dollop of chocolate on her washing machine! But, oh my are these worth all of that. However big (or small) you make them, just 1 piece won't be enough!

Monday, 8 October 2012

Caramelised Pear & Pecan Bread Pudding

Pin It
Theres nothing like blowing monday's cobwebs away than with a bread pudding fresh out of the oven. My mum alway makes bread pudding with brioche so I bought a delicious loaf and with pear season in full swing I thought it would be rude not to include them. The custard is really simple to make, theres no egg separating or even heating you pretty much just whisk everything together and then pour onto the brioche before leaving it to soak. This pudding takes around an hour to cook so you do need to be a little patient but my god is it worth the wait! Its safe to say my husband was jumping for joy when he got in from work to discover this little beauty waiting for him!

Makes in a 9x8" dish
Recipe adapted from Tartine
You will need-
  • 6 1inch slices of brioche bread
  • 8 large eggs
  • 3/4 cup caster sugar
  • 4 cups whole milk
  • 1 1/4 tsp vanilla extract
  • 1/2 tsp salt
  • 2 tsp cinnamon
  • 3 pears, peeled & cubed
  • 50g unsalted butter
  • 50g soft light brown sugar
  • 1/4 cup roughly chopped pecans
Pre-heat the oven to 170C. Place the brioche on a baking tray into the oven till its lightly toasted. Leave to cool whilst you make the custard.
In a large bowl whisk together the eggs before adding the sugar. Continue whisking till smooth and then add the milk, vanilla, salt & cinnamon. Mix one more time then set aside.

Place the brioche slices in your dish and then pour over the custard, you may not be able to fit it all in, if this is the case leave it to one side for topping up later. Let the pudding sit for at least 10 minutes so the bread has time to soak the majority of the custard.

Top up if needed and then cover with foil and bake for around an hour. Be sure to check at the 45 minute stage, just use a knife to peek into the middle and if its still really liquid cook for another 15 minutes or so. At this stage place the pears, sugar and butter in a saucepan and cook gently till the pears soften. When the bread pudding comes out of the oven poke little holes in the top and press the pears deep into it. Scatter the rest on top and pour some of the caramel onto it. Top with the pecans and then put back in to oven without the foil for 5-10 minutes. This will give the pudding a lovely crunchy topping. Let it cool for at least 30 minutes to give the custard a chance to set and then serve on its own or if you want to be really indulgent, with a scoop of vanilla ice-cream.

If you do have lots of custard left over like I did, just pour into individual ramekins and place in a ban-marie in the oven. Bake at 170C for around 30 minutes or till set. Once cooled, turn out onto a plate and there you have a delicious cinnamon flan! 2 desserts in 1, what more could you ask for?

Friday, 21 September 2012

Ombre Mr Penfold Cake

Pin It
I recently set myself a challenge of making the tackiest cake I could (without including edible glitter, don't get me started on that). I'm not normally one for overly decorated cakes as I feel they're just trying to compensate on the lack of flavour. Give me a 'rustic' looking walnut loaf any day over a red velvet layer cake with all the bells and whistles. But I have always secretly wanted to have a play around with gel food colouring and as pinterest calls it, an Ombre cake.

Last week was the opening for the All Type No Face exhibition and I agreed to make a cake. I had initially thought to make a typography cake by cutting letters out a a sheet of cake but as Tim's painting include quite a lot of fades I thought this would be the perfect solution. I took inspiration from the painting below and quickly set out making 4 batches of sponge cake. As I only have 2 cake tins I did these in 2 go's making a simple sponge consisting of 180g sugar, 180g unsalted butter, 3 large eggs, 180g flour, 2 tsp baking powder which then got split in half (weigh the total mixture and then divide evenly) before adding varying amounts of pink food dye. If you want to do this at home, these measurements are for a 9" tin but would also work for a smaller one if you were happy to have a taller cake, just watch the cooking times. To put the cake together I made up a simple buttercream using equal measures of softened butter & icing sugar. Once you've put all the layers together I recommend doing a 'crumb layer', which is a thin layer of icing over the whole cake that holds all the crumbs in place. If you pop the cake in the fridge for 15 minutes that will slightly set and will make putting the 2nd layer of icing much easier.

crumb, layer, cake, icing, layers, ombre, buttercream, butter, sugar, sponge, cake, deorating
Finally, I used coloured royal icing which I rolled out thinly and Tim & I set about cutting a face for the character. This was a hardest past and made the perfectionist in me twitch, but I was pretty happy with the final result. Unfortunately for me, the cake was eaten in the blink of an eye so the only photo I managed to get was on my phone. Tim & I didn't even get to sample our creation in the end, but the feedback was pretty good.

Tuesday, 28 August 2012

Peach Upside Down Cake

Pin It
Since getting my new job my home baking has gone a bit minimal. Its pretty perfect for me because I get the enjoyment of making lots of different things every day but my waistline stays in check because I  don't end up eating half a cake when it emerges from the oven. However, yesterday I bought the most beautiful, sweet peaches and after putting 2 aside to eat fresh I decided the best thing for them was to make an upside down cake. This cake is really simple to make and aslong as you line your cake tin you won't have any problems with turning it out. (You can see my tutorial on how to do that here). I took the cake to a friends house who had prepared the most epic barbecue I have ever eaten, think beef ribs, pulled pork & pork ribs all in incredible sweet, spicy marinades & the most incredible Boston beans, slaw & pickled fennel. The meat had been cooked slowly on the barbecue for 6 or so hours and induced the biggest meat coma ever. But meat aside, we all somehow managed to make some room for a slice (or 2) of cake at the end. The syrup from the peaches soaks into the cake when it gets turned over so you end up with a light but syrupy sponge with just a little tang from the peaches. I'm glad I decided against taking the leftovers home as I would have eaten some for breakfast for sure.

Makes a 23cm round cake
You will need-
  • 1 tbsp brown sugar
  • 1 tsp cinnamon
  • 1/2 tsp nutmeg
  • 2 peaches, stoned and cut into thin wedges
  • 1 tbsp golden syrup (optional)
  • 180g softened butter
  • 180g caster sugar
  • 3 large eggs (roughly 180g total if using smaller eggs)
  • 1/2 tsp almond extract
  • 180g plain flour
  • 2 tsp baking powder
Pre-heat your oven to 170C. Next, sprinkle the base of your lined cake tin with the brown sugar, cinnamon & nutmeg then lay the peach slices on top. At this point you could pour some golden syrup onto the peaches if you want the peaches to be a bit more caramelised.

To make the sponge filling whisk together the butter & sugar till its light and fluffy then add the eggs 1 by 1 and beat till mixed in. Add the almond extract in with the last egg and mix well. Finally add the flour & baking powder and fold into the wet ingredients. Spoon into the cake tin and gently spread over the fruit. Bake in the oven for around 30-35 minutes. The cake is ready when its golden brown and a skewer comes out clean. Leave the cake to cool for 10 minutes and then remove the outer ring of the cake tin and the baking paper. Place a plate or cake stand on top of the cake and carefully turn the cake over onto it. Gently peel away the baking paper from the base and leave the cake to finish cooling. The cake is delicious on its own but would be great with a dollop of ice-cream or creme fraiche.


Monday, 23 July 2012

Raspberry, Coconut & Almond Slice

Pin It
raspberry, almond, coconut, cake, sweet, tea, afternoon, birthday, present, treat, sweet, brownie, slice, bake, jam, crunchy, delicious, tasty,
If you haven't already noticed, I have a new love of baking with raspberries. The fact they're in season is also a huge bonus. I love how when they're cooked they turn into puddles of jam with the tart flavours balancing perfectly with the sweet cake. The coconut crumble topping adds a perfect crunch to the slice. They are deliciously moorish, and with all that fruit in them, you can almost convince yourself that eating more than 1 is fine. Because after all its contributing to 1 of your 5 fruit & veg a day isn't it? Apart from the taste and health benefits (ahem) they also look so pretty and would make the perfect addition to any table.

Makes 16 squares in a 21x21cm tin
You will need-
  • 250g plain flour
  • 1.5 tsp baking powder
  • 50g ground almonds
  • 280g granulated sugar
  • 200g cold, cubed butter
  • 25g shaved coconut
  • 25g desiccated coconut
  • 2 eggs
  • 350g raspberries (you can also use frozen, just make sure you defrost them first)
Preheat your oven to 180C and then line your baking tin with greaseproof paper.

In a bit bowl, combine the flour, baking powder, ground almonds, sugar & butter. Using your finger tips rub the butter into the dry ingredients till you get a sandy consistency and it starts to come together. Take out 80g and place mix with the shaved & desiccated coconut. Mix together and put to one side.
raspberry, almond, coconut, cake, sweet, tea, afternoon, birthday, present, treat, sweet, brownie, slice, bake, jam, crunchy, delicious, tasty, crumble
Crack the eggs into the remaining crumble mixture and mix till it all starts to come together. All of this can be done in a food processor if you're short of time.

Place the mixture in your baking tin and smooth it down lightly before sprinkling the raspberries all over (keep a small handful aside for the top of the slice). Now evenly spread the coconut mixture on top and bake in the oven for around 40 minutes.
raspberry, almond, coconut, cake, sweet, tea, afternoon, birthday, present, treat, sweet, brownie, slice, bake, jam, crunchy, delicious, tasty, crumble, raspberries

raspberry, almond, coconut, cake, sweet, tea, afternoon, birthday, present, treat, sweet, brownie, slice, bake, jam, crunchy, delicious, tasty, crumble, raspberries

raspberry, almond, coconut, cake, sweet, tea, afternoon, birthday, present, treat, sweet, brownie, slice, bake, jam, crunchy, delicious, tasty, crumble, raspberries
When the 40 minutes are up, sprinkle the remaining raspberries on top and bake for another 15-20 minutes or until the cake feels firm as is golden brown. Leave the cake to cool completely in the tin then cut into squares.

Because of the fresh fruit I recommend keeping the slices in the fridge but thats if they last past a day!
raspberry, almond, coconut, cake, sweet, tea, afternoon, birthday, present, treat, sweet, brownie, slice, bake, jam, crunchy, delicious, tasty, crumble, raspberries

raspberry, almond, coconut, cake, sweet, tea, afternoon, birthday, present, treat, sweet, brownie, slice, bake, jam, crunchy, delicious, tasty, crumble, raspberries

raspberry, almond, coconut, cake, sweet, tea, afternoon, birthday, present, treat, sweet, brownie, slice, bake, jam, crunchy, delicious, tasty, crumble, raspberries

Related Posts Plugin for WordPress, Blogger...