Showing posts with label cake. Show all posts

Thursday, 20 June 2013

Rhubarb & Ginger Crumble Slice

Pin It

If you know me in real life you'll know that I've had a long time aversion to rhubarb. I have a feeling it was a bad batch of rhubarb crumble that put me off for a long time but with the help of Jo's Rhubarb Crumble cocktail at Sweeteasy and Jack's Gelato's Allotment rhubarb sorbet I have finally begun to see what all the fuss it about.

I thought there was no better way to celebrate my new found love than with a recipe.

Makes 16 squares from a 20x20cm tin
You will need-
For the crumble
  • 70g oats
  • 240g plain flour
  • 130g caster sugar
  • 40g light brown sugar
  • 3/4 tsp baking powder
  • 1/2tsp salt
  • 170g butter, cubed
  • Zest of 1/2 lemon
  • 1 egg, beaten

For the middle
  • 1tsp ground ginger
  • 4 tsp cornflour
  • 85g light brown sugar
  • 380g rhubarb in 1/2 inch slices
  • 2 pieces of stem ginger in syrup, finely diced
  • 1tbsp syrup form stem ginger jar

To begin preheat your oven to 190C (less if fan assisted) and line your 20x20cm baking tin.

In a bowl combine all the dry ingredients from the crumble ingredients and then add the butter. Rub the butter into the dry ingredients using your thumbs and index fingers like you're fanning out playing cards. Keep going till the mixture starts to clump together but don't overwork it, you still want it to be crumbly. Add the lemon zest and egg and mix till just combined.

Place 2/3 of the mixture into your tin and press down. If its a little sticky you can use a scrap bit of baking parchment to help.
In a separate bowl combine the rhubarb pieces with the remaining ingredient and mix till it evenly coats its then spread out over the dough in the tin.
Finally, crumble the remaining dough over the rhubarb and place on the middle shelf in the oven. Bake for 45-50 minutes or til the the crumble is a golden brown colour. Leave to cool completely before cutting into squares. It keeps best in the fridge if it lasts past a day.


Wednesday, 17 October 2012

Jaffa Cake Lamingtons

Pin It
baking, cake, children, sweet, sponge, lamington, australia, snowball, snoball, jaffa cake, homemade. treat, dessert, supper, club,
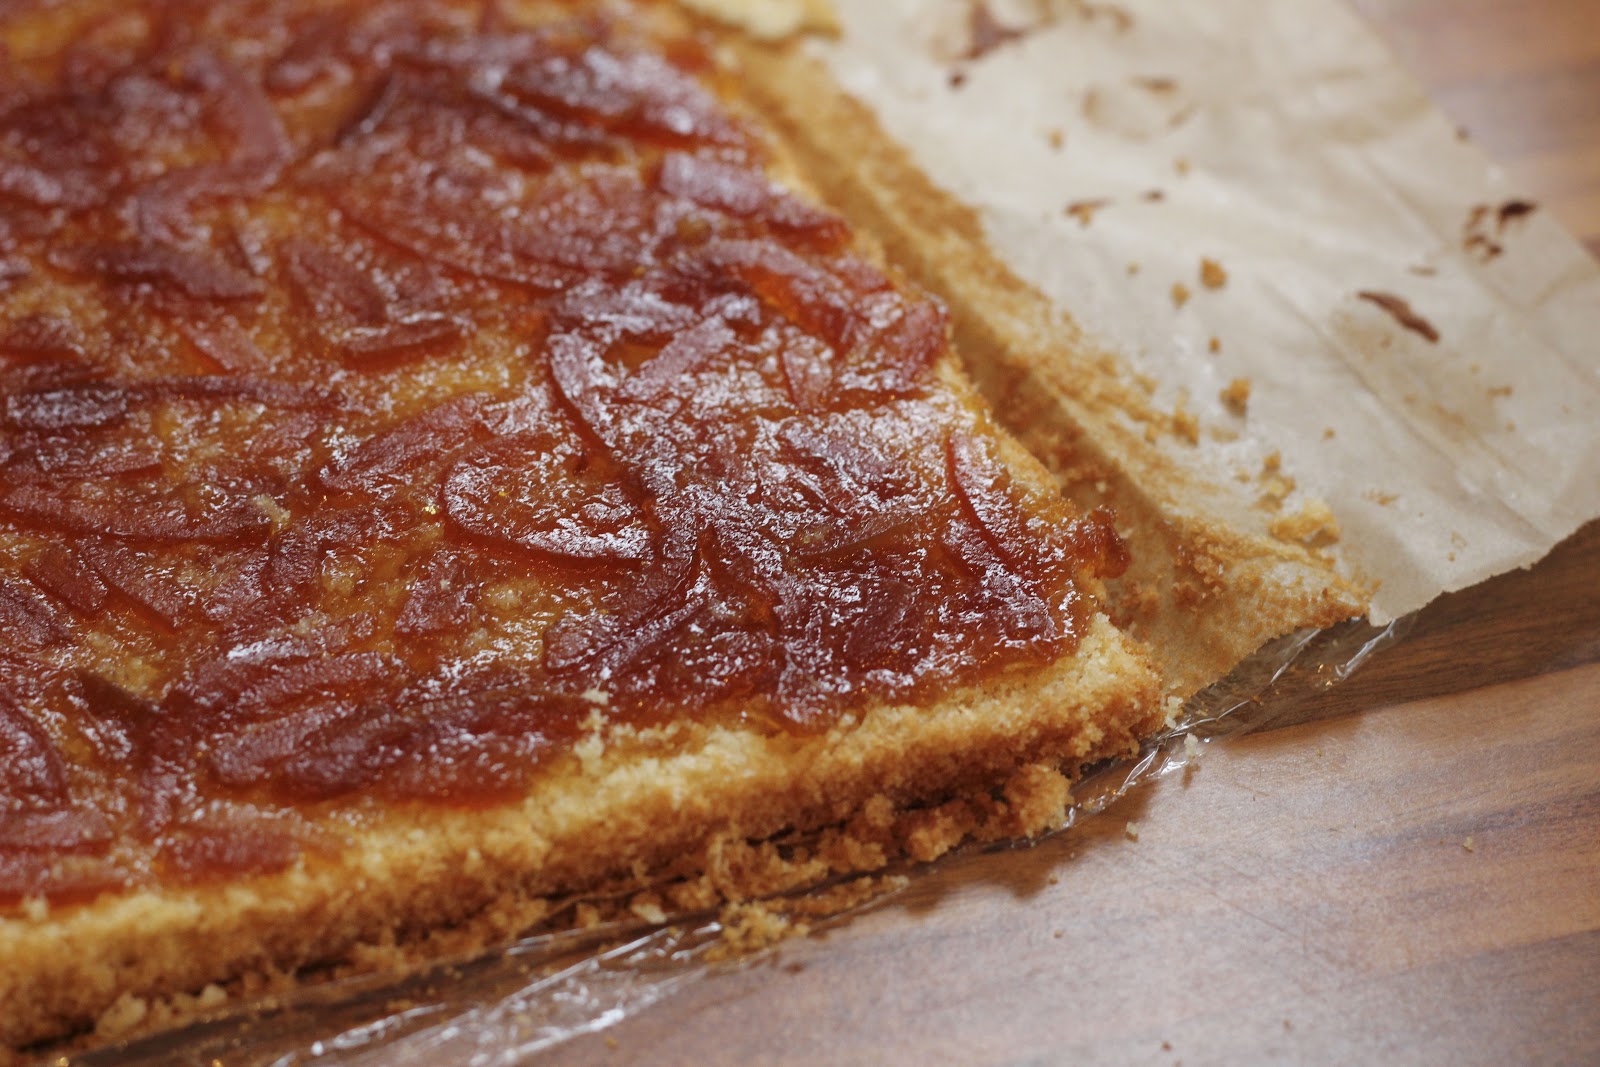
The last time I mentioned lamingtons on this blog I told of a disastrous afternoon in the kitchen. I did however vow to try these again but this time using my own recipe. Now, I don't want to gloat, but I must say these lamingtons beat Dan Lepard's hands down! When Jo & I were planning the menu for the childhood memories supper club I had a bit of a light bulb moment the idea of combining 2 of my favourite sweet treats into 1 popped into my head. Ok, so I admit, lamingtons aren't really from my childhood but their appearance reminds me of Snowballs so perhaps its in actual fact a merge of all 3!

I initially had the idea of using orange jelly as the jaffa cake component but when it came to the taste tests we decided they were way to sweet. Luckily Jo thought on her feet and suggested using the last of her homemade seville orange marmalade and oh my what a treat! Sadly, Jo doesn't have any marmalade left so please don't go knocking at her door. But, you could just use a good quality shop bought or if you're feeling heroic, make your own. We discovered that the lamingtons are even better the next day. So, if you can stand to wait I promise it will be worth it. I just hope I don't get an influx of angry emails from Aussies for messing around with a classic.

Makes 1 20x20cm tin
You will need-
  • 180g unsalted butter, softened
  • 180g caster sugar
  • 3 large eggs
  • 180g plain flour
  • 2 tsp baking powder
  • 1/2 jar seville orange marmalade
  • 10g cocoa powder
  • 30ml cold milk
  • 120ml boiling water
  • 135g dark chocolate, grated or finely chopped
  • 300g icing sugar
  • 250g desiccated coconut
Preheat your oven to 175C. To make the sponge, whisk together the butter and sugar till light and creamy and then one by one, whisk in the eggs. Sieve the flour and baking powder into the bowl and  fold into the butter mixture. Spoon into your tin and smooth the mixture down evenly before baking for around 30 minutes. Check the cake after about 20 minutes and turn in the oven if needed.

Leave the cake to cool completely before cutting it in half horizontally. Spread the marmalade carefully over the bottom layer and then sandwich the top layer back on and press down gently.

baking, cake, children, sweet, sponge, lamington, australia, snowball, snoball, jaffa cake, homemade. treat, dessert, supper, club, marmalade, jam
To make the chocolate coating, mix together the cocoa powder and milk in a bowl till you have a paste. Then whisk in the boiled water followed by the chocolate till it melts. Finally add the icing sugar and then you're ready to go. We found that its best to add a little coconut to a flat dish at a time otherwise it will all get coated in chocolate and you'll end up with a mess.

Cut the sponge into cubes and then get your production line ready. 1st your chocolate, then your coconut and finally a wire rack lined with greaseproof paper. I would suggest having a second pair of hands, one person getting covered in chocolate and the other the coconut but if you're making them on your own just keep one hand free of chocolate as that will help the lamingtons stay neat and tidy.

Once you have coated them all in chocolate and coconut, leave them to set for at least an hour but longer if you can. They can then be stored in an airtight box for a few days.
baking, cake, children, sweet, sponge, lamington, australia, snowball, snoball, jaffa cake, homemade. treat, dessert, supper, club, marmalade, jam
I must finish by saying- I accept no responsibility for chocolate or coconut being found dotted around your home for days to come. Despite there being 2 of us, Jo found a dollop of chocolate on her washing machine! But, oh my are these worth all of that. However big (or small) you make them, just 1 piece won't be enough!

Tuesday, 28 August 2012

Peach Upside Down Cake

Pin It
Since getting my new job my home baking has gone a bit minimal. Its pretty perfect for me because I get the enjoyment of making lots of different things every day but my waistline stays in check because I  don't end up eating half a cake when it emerges from the oven. However, yesterday I bought the most beautiful, sweet peaches and after putting 2 aside to eat fresh I decided the best thing for them was to make an upside down cake. This cake is really simple to make and aslong as you line your cake tin you won't have any problems with turning it out. (You can see my tutorial on how to do that here). I took the cake to a friends house who had prepared the most epic barbecue I have ever eaten, think beef ribs, pulled pork & pork ribs all in incredible sweet, spicy marinades & the most incredible Boston beans, slaw & pickled fennel. The meat had been cooked slowly on the barbecue for 6 or so hours and induced the biggest meat coma ever. But meat aside, we all somehow managed to make some room for a slice (or 2) of cake at the end. The syrup from the peaches soaks into the cake when it gets turned over so you end up with a light but syrupy sponge with just a little tang from the peaches. I'm glad I decided against taking the leftovers home as I would have eaten some for breakfast for sure.

Makes a 23cm round cake
You will need-
  • 1 tbsp brown sugar
  • 1 tsp cinnamon
  • 1/2 tsp nutmeg
  • 2 peaches, stoned and cut into thin wedges
  • 1 tbsp golden syrup (optional)
  • 180g softened butter
  • 180g caster sugar
  • 3 large eggs (roughly 180g total if using smaller eggs)
  • 1/2 tsp almond extract
  • 180g plain flour
  • 2 tsp baking powder
Pre-heat your oven to 170C. Next, sprinkle the base of your lined cake tin with the brown sugar, cinnamon & nutmeg then lay the peach slices on top. At this point you could pour some golden syrup onto the peaches if you want the peaches to be a bit more caramelised.

To make the sponge filling whisk together the butter & sugar till its light and fluffy then add the eggs 1 by 1 and beat till mixed in. Add the almond extract in with the last egg and mix well. Finally add the flour & baking powder and fold into the wet ingredients. Spoon into the cake tin and gently spread over the fruit. Bake in the oven for around 30-35 minutes. The cake is ready when its golden brown and a skewer comes out clean. Leave the cake to cool for 10 minutes and then remove the outer ring of the cake tin and the baking paper. Place a plate or cake stand on top of the cake and carefully turn the cake over onto it. Gently peel away the baking paper from the base and leave the cake to finish cooling. The cake is delicious on its own but would be great with a dollop of ice-cream or creme fraiche.


Monday, 23 July 2012

Raspberry, Coconut & Almond Slice

Pin It
raspberry, almond, coconut, cake, sweet, tea, afternoon, birthday, present, treat, sweet, brownie, slice, bake, jam, crunchy, delicious, tasty,
If you haven't already noticed, I have a new love of baking with raspberries. The fact they're in season is also a huge bonus. I love how when they're cooked they turn into puddles of jam with the tart flavours balancing perfectly with the sweet cake. The coconut crumble topping adds a perfect crunch to the slice. They are deliciously moorish, and with all that fruit in them, you can almost convince yourself that eating more than 1 is fine. Because after all its contributing to 1 of your 5 fruit & veg a day isn't it? Apart from the taste and health benefits (ahem) they also look so pretty and would make the perfect addition to any table.

Makes 16 squares in a 21x21cm tin
You will need-
  • 250g plain flour
  • 1.5 tsp baking powder
  • 50g ground almonds
  • 280g granulated sugar
  • 200g cold, cubed butter
  • 25g shaved coconut
  • 25g desiccated coconut
  • 2 eggs
  • 350g raspberries (you can also use frozen, just make sure you defrost them first)
Preheat your oven to 180C and then line your baking tin with greaseproof paper.

In a bit bowl, combine the flour, baking powder, ground almonds, sugar & butter. Using your finger tips rub the butter into the dry ingredients till you get a sandy consistency and it starts to come together. Take out 80g and place mix with the shaved & desiccated coconut. Mix together and put to one side.
raspberry, almond, coconut, cake, sweet, tea, afternoon, birthday, present, treat, sweet, brownie, slice, bake, jam, crunchy, delicious, tasty, crumble
Crack the eggs into the remaining crumble mixture and mix till it all starts to come together. All of this can be done in a food processor if you're short of time.

Place the mixture in your baking tin and smooth it down lightly before sprinkling the raspberries all over (keep a small handful aside for the top of the slice). Now evenly spread the coconut mixture on top and bake in the oven for around 40 minutes.
raspberry, almond, coconut, cake, sweet, tea, afternoon, birthday, present, treat, sweet, brownie, slice, bake, jam, crunchy, delicious, tasty, crumble, raspberries

raspberry, almond, coconut, cake, sweet, tea, afternoon, birthday, present, treat, sweet, brownie, slice, bake, jam, crunchy, delicious, tasty, crumble, raspberries

raspberry, almond, coconut, cake, sweet, tea, afternoon, birthday, present, treat, sweet, brownie, slice, bake, jam, crunchy, delicious, tasty, crumble, raspberries
When the 40 minutes are up, sprinkle the remaining raspberries on top and bake for another 15-20 minutes or until the cake feels firm as is golden brown. Leave the cake to cool completely in the tin then cut into squares.

Because of the fresh fruit I recommend keeping the slices in the fridge but thats if they last past a day!
raspberry, almond, coconut, cake, sweet, tea, afternoon, birthday, present, treat, sweet, brownie, slice, bake, jam, crunchy, delicious, tasty, crumble, raspberries

raspberry, almond, coconut, cake, sweet, tea, afternoon, birthday, present, treat, sweet, brownie, slice, bake, jam, crunchy, delicious, tasty, crumble, raspberries

raspberry, almond, coconut, cake, sweet, tea, afternoon, birthday, present, treat, sweet, brownie, slice, bake, jam, crunchy, delicious, tasty, crumble, raspberries

Thursday, 19 July 2012

Camomile Tea & Raspberry Madeleines

Pin It
madeleine, chamomile, camomile, baking, raspberry, infused, infuse, sweet, bake, cake, french, dessert, butter
The last time I made madeleines they were such a success that I have been looking for an excuse to make them ever since. Whilst in Copenhagen I quite randomly bought a huge bag of dried camomile flowers with the plan to do some experimenting with them. Ever since we got back I have been racking my brain for what I could bake with them until the eureka moment came and I decided on brewing the tea in butter and turn it into madeleines. These are a bit more work than your usual cakes or biscuit but the outcome is so rewarding that I promise you it will be worth the effort.
madeleine, chamomile, camomile, baking, raspberry, infused, infuse, sweet, bake, cake, french, dessert, butter


If you can't find a bag of loose camomile use tea bags instead, but just up the quantity slightly. (Tea Pigs sell teabags of camomile flowers so keep an eye out for them)


The recipe makes around 22 madeleines depending on the size of your tin. I still haven't got around to buying a tin so used little metal tart cases instead.


You will need-
  • 170g unsalted butter
  • 150g plain flour
  • 4g baking powder
  • 1/8 tsp salt
  • 2 medium eggs at room temperature
  • 120g icing sugar
  • 2 tbsp honey
  • 2tbsp camomile loose tea
  • Punnet of raspberries or enough raspberries for 1 on top of each madeleine
First begin by melting your butter in a small saucepan and bring it close to boil before adding the camomile. Brew the tea for around 4 minutes then strain and leave to one side to cool.


madeleine, chamomile, camomile, baking, raspberry, infused, infuse, sweet, bake, cake, french, dessert, butter
Sift together the flour, baking powder & salt and then put to one side too.

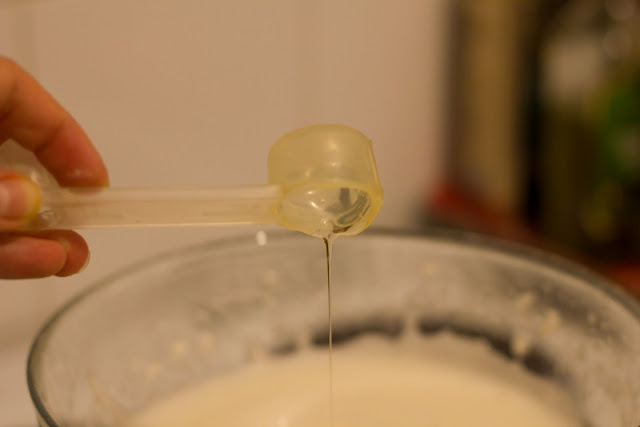
Crack in the eggs and add the icing sugar to a large glass bowl and place over a pan of boiling water. Whisk with an electric hand whisk till it has tripled in side and ribbons of mixture come off the beaters when you lift them out of the bowl. Now add the honey and mix till combined.
madeleine, chamomile, camomile, baking, raspberry, infused, infuse, sweet, bake, cake, french, dessert, butter, whisk, beater, egg, flour
madeleine, chamomile, camomile, baking, raspberry, infused, infuse, sweet, bake, cake, french, dessert, butter, whisk, beater, egg, flour, honey
Cover the bowl with a tea towel and place in the fridge for at least an hour.

Once you're ready to bake, preheat your oven to 180C. Brush each case well with butter and then dust with flour. Miss this step out at your peril! Now spoon a generous tablespoon of mix into each case before pressing a raspberry into the centre. Bake for 10-12 minutes. They should spring back when you touch them and be light golden. Turn out of the case and leave to cool on a wire rack before dusting with icing sugar.
madeleine, chamomile, camomile, baking, raspberry, infused, infuse, sweet, bake, cake, french, dessert, butter, whisk, beater, egg, flour

Thursday, 26 January 2012

Carrot & Walnut Loaf

Pin It

I recently did some catering for an event and decided to make a carrot and walnut type loaf. I searched high and low around the internet till I found a recipe on the trusty BBC good food website. I liked the idea of using half regular self raising flour and half wholemeal and without the icing its a slightly healthy option for a cake as you're using oil instead of butter, also great for those who are dairy free. Annoyingly my icing came out a little runnier as I got impatient waiting for the butter to soften so gave it a helping hand. Don't be like me if though, just leave it out overnight. 

I have to add, this cake is so moist (I love that word) and moorish and keeps for a few days (if it lasts that long without being eaten that is) and is a great accompaniment for your afternoon tea anytime of the day!

Recipe slightly adapted from BBC Good Food
You will need-
  • Zest & Juice of 1 orange
  • 50g sultanas
  • 150ml sunflower oil plus some from greasing
  • 2 free range eggs
  • 140g soft light brown sugar
  • 85g self raising flour
  • 85g wholemeal self-raising flour
  • 2 tsp ground cinnamon
  • 2 tsp ground mixed spice
  • 1 tsp bicarbonate of soda
  • 140g carrots, grated
  • 50g chopped walnuts plus some halves for decorating.
Icing
  • 200g soft cheese
  • 50g butter, softened
  • 85g icing sugar cinnamon
  • 1 tsp vanilla extract
The recipe suggests that you soak the sultanas in the orange juice and zest overnight or to microwave the mixture on a medium heat for 1-2 minutes. As I didn't plan ahead and don't have a microwave (shock horror) I left mine to sit on top of my oven for a few hours whilst I did some other baking and it seemed to work fine.

So, pre-heat your oven to 180C and grease and line a loaf tin with some oil and greaseproof paper (it should be a 2lb tin). In a large bowl mix together the flours, sugar, cinnamon, mixed spice and bicarbonate then add the sultanas along with the juice and zest, grated carrot and walnuts. 
In a separate bowl, whisk together the eggs and oil and add to the flour mixture. Mix it all really well the pour the mixture into the tin and bake for around an hour or until a skewer comes out clean. Leave the cake to cool completely in the tin.

To make the icing use an electric whisk and start by beating the butter so its really soft and creamy and then add the soft cheese, icing sugar & vanilla till you have a really smooth consistency (don't be impatient like me and use firm butter). Remove the loaf from the tin and spread the icing on. Decorate with the walnut halves if you want to bit a little fancy.

Enjoy x

Tuesday, 3 January 2012

Blueberry Crumble Muffins

Pin It
This is the third in my mini series of Ottolenghi recipes. Its a fantastic take on blueberry muffins with an irresistible crumble topping. It would be a nice idea to make the crumble with ground up oats which I will try out next time. I halved the original recipe and I'm glad I did because I ended up with 12 muffins and a mini loaf from the mixture even though the regular recipe states that it will make 10-12 muffins. I have a regular sized muffin tin so I'm not quite sure what happened there. The recipe I have included is the halved recipe but of course if you wanted to make the regular batch you could easily double this recipe. 

You will need-
Crumble
  • 75g plain flour
  • 25g caster sugar
  • 50g cold unsalted butter, cubed
Place all the ingredients into a food processor and mix for a couple of seconds until you get breadcrumb texture. Be sure that there aren't any lumps of butter left. You could of course use your hands instead and rub the butter into the flour and sugar but I'm just a little lazy.

I ended up with more crumble than I needed so I froze the rest for next time although you could work the mixture into a dough and then make biscuits from it.

Muffins
  • 270g plain flour
  • 1 & 1/2 tsp baking powder
  • 1/4 tsp salt
  • 1 free range egg
  • 170g caster sugar
  • 70g melted unsalted butter, cooled slightly
  • 190ml milk
  • Grated zest of 1/2 lemon
  • 1/2 Granny Smith apple diced into 1cm cubes
  • 100g blueberries plus extra for the topping
Begin by preheating your oven to 170C and then line your muffin tin with cases.

In a large bowl lightly whisk the egg with the sugar & melted butter followed by the milk & lemon zest then fold in the fruit. Next sift the flour, baking powder and salt into the mixture and fold everything in together really gently. Like the previous muffin recipe, you want it to still be lumpy.


Spoon the mixture to the top of each case and then cover the tops with plenty of the crumble mix. Pop a couple of spare blueberries on top of each muffin and then bake for 30-35 minutes. A skewer should come out clean when inserted to the middle.

Once cooked cool on a wire rack and then dig in!


Enjoy x

Sunday, 1 January 2012

Plum, Marzipan & Cinnamon Muffins

Pin It

Happy New Year everyone! I thought I would kick off the year with 3 recipes from the newest cookbook in my collection (thanks Mr Igs) I have been a big fan of Ottolenghi for a long time now and I can't quite believe it has taken this long for me to get 'The Cookbook'. A few days ago I decided to have a bit of a baking marathon. This recipe was the first one that jumped out at me, I have never thought to add grated marzipan to a muffin/cake before but its something I will definitely be doing from now on. You could always leave out the plum compote, they're hardly in season right now but it does add a little special touch to these muffins. I ended up halving the recipe when I made it as I didn't want to end up with too many muffins but the recipe below is the original recipe.

Makes 10-12
You will need-
  • 480g plain flour
  • 1 tsp baking powder
  • 1/2 tsp bicarbonate of soda
  • Pinch of salt
  • 1 tsp ground cinnamon
  • 200g caster sugar
  • 2 free range eggs
  • 110g unsalted butter, melted & cooled slightly
  • 280ml milk
  • Zest of 2 oranges
  • 120g marzipan
  • Icing sugar for dusting
Plum Compote
  • 700g ripe red plums- stoned & cut into quaters
  • 60g caster sugar
  • 1 cinnamon stick

Begin by making the compote. Pre-heat the oven to 170C and then mix together the plums, sugar & cinnamon in a shallow baking dish and bake for 10 to 20 minutes. The plums should be soft & the skins should start coming away from the flesh. Once they're ready leave them to one side to cool completely. When the mixture cooled I blitzed the compote in a food blender very briefly just to break it down a little more.
In a large bowl whisk together the sugar & eggs then add the melted butter and milk and stir to combine it all together. Grate the marzipan and then add it to the mixture along with the zest of the oranges and 80g of the compote.


Now sieve the flour, baking powder, bicarbonate of soda, cinnamon & salt into the mixture and then fold it gently into the mixture. Do it till its just combined, you want it to still have some lumps in it.


Spoon the mixture into a lined muffin tin- make sure you fill them up all the way to the top, then bake for 25-30 minutes. To check if they're cooked insert a skewer in to the centre of the muffin. It will come out clean when ready.


Place the muffins on a wire rack to cool completely. To serve, dust the muffins with icing sugar and spoon a dollop of compote on top then dig in. Trust me, these muffins won't last very long in your house! They are absolutely perfect for breakfast.
Enjoy x


I am linking this post up to Sweet at Sugar Cookies Sweets for a Saturday #50. Thanks to Lisa for the invite.

Thursday, 29 December 2011

Chocolate Roulade

Pin It
The week leading up to Christmas we had a Christmas meal with my husband's family as we were all off doing our own thing on Christmas day. So I made this chocolate roulade for pudding as a couple of my family members are wheat intolerant. I saw this chocolate roulade being made on The Great British Bake Off and even though it looked delicious I was slightly put off by seeing how they all struggled with making it. I am happy to report that it came out much better than expected and as long as you stick to the recipe you shouldn't have any problems. If you ignore the cream in the middle this roulade is pretty healthy for cake standards, no flour or butter and is still super rich so it doesn't leave you feeling cheated in the slightest!

Recipe from Mary Berry
You will need-
  • 175g plain chocolate broken into pieces
  • 175g caster sugar
  • 6 eggs separated
  • 2 tbsp cocoa, sieved
  • 300ml double cream (heavy cream)
  • Icing sugar

Preheat your oven to 180C then begin by lightly greasing a 33 x 23 cm swiss roll tin and line it with greaseproof paper. Make sure you push the paper into the corners.

Melt the chocolate in a glass bowl over a pan of simmering water and then leave it to cool slightly.

In a large bowl add the sugar and egg yolks and whisk with an electric hand whisk until it goes light and creamy. Next add the cooled chocolate and stir until everything is blended.

In a separate large bowl whisk your egg whites until they are stiff but not dry then fold in a large spoonful of the egg white into the chocolate mixture. Now stir in the rest of the egg whites folding carefully so as not to knock too much air out of the mixture. Finally add the cocoa and mix in gently.

Pour the mixture into your tin and bake for around 20 minutes or until its firm to the touch.
Remove the cake from the oven but leave it in the tin. Mary suggests that you place a cooling rack over the cake and then lay a damp tea towel over it. This will stop the cake from drying out whilst it cools. Leave it like this for a few hours or overnight but be sure to re-dampen the tea towel if it dries out. The cake will also sink slightly during this time.


When the cake is cooled whip the cream till it just starts to hold its shape. Next dust a large piece of greaseproof paper with icing sugar and then turn the cake out onto it so its face down. Remove the greaseproof paper from the underside and spread the cream out over the whole surface.
Start at a short ends roll the roulade up starting tightly at first use the greaseproof paper that the roulade is laying on the help you. The roulade will crack in places but don't worry Mary assures its part of the charm!

Sprinkle with some more icing sugar if needed then serve with fresh fruit.
Enjoy
Related Posts Plugin for WordPress, Blogger...